1 Installation and Deployment
1.1 Goal
Prepare Docker and Docker Compose on a Linux x86_64 server, download the Sa2web installation package, complete the first installation, and finish the minimum usable configuration: register a license, add a machine, add a browser, authorize a group, and finally open Cloud Browser from the normal user frontend.
Sa2web’s basic official requirements are: 1 CPU core or more, 4 GB of memory recommended (2 GB minimum), Linux x86_64, and the ability to run Docker commands.
This guide uses Ubuntu 24.04 LTS x86_64 as the example.
1.2 Prepare an Ubuntu Server
Recommended minimum preparation:
| Item | Recommendation |
|---|---|
| Operating system | Ubuntu 24.04 LTS x86_64 |
| CPU | 2 cores or more is better for testing and real use |
| Memory | 4 GB or more |
| Permissions | root or sudo |
| Network | The server can reach Docker image sources, and clients can reach the server |
| Domain name | For public deployment, prepare a domain name resolved to the server’s public IP |
Before installation, confirm the server addresses:
| Address | Purpose | Example |
|---|---|---|
| Private IP | Communication between Sa2web services and keeper/browser components | 192.168.1.111 |
| Public IP | External user access entry | 203.0.113.10 |
| Domain name | Production HTTPS certificate and access address | browser.example.com |
Sa2web currently requires Linux x86_64 for server deployment. Windows, macOS, and ARM64 are not part of the current officially supported deployment environment.
If you are only testing on a LAN, you can temporarily use the private IP for both the public IP and domain fields. The access address will look like https://192.168.1.105/. If the browser address bar warns that the certificate is not secure, see Section 1.10.2.
1.3 Install Docker and Docker Compose
Docker currently recommends installing Docker Engine through the apt repository.
sudo apt update
sudo apt install -y ca-certificates curl
sudo install -m 0755 -d /etc/apt/keyrings

sudo curl -fsSL https://download.docker.com/linux/ubuntu/gpg \
  -o /etc/apt/keyrings/docker.asc
sudo chmod a+r /etc/apt/keyrings/docker.asc
Add the repository:
sudo tee /etc/apt/sources.list.d/docker.sources >/dev/null <<EOF2
Types: deb
URIs: https://download.docker.com/linux/ubuntu
Suites: $(. /etc/os-release && echo "${UBUNTU_CODENAME:-$VERSION_CODENAME}")
Components: stable
Architectures: $(dpkg --print-architecture)
Signed-By: /etc/apt/keyrings/docker.asc
EOF2

sudo apt update
Install:
sudo apt install -y \
  docker-ce docker-ce-cli containerd.io \
  docker-buildx-plugin docker-compose-plugin
Verify:
docker --version
docker compose version
sudo docker ps
For a non-root user, add the current user to the docker group:
sudo usermod -aG docker $USERLog in to the terminal again, then run:
docker ps1.4 Download the Sa2web Installation Package
Open the Sa2web website:
https://www.sa2web.comClick the Download menu at the top to open the download page, then choose the version you need, such as Team Edition or Enterprise Edition.
If you are not logged in, you will be asked to create an account or log in before downloading. If you do not have an account yet, register a new one:
- Enter your email address.
- Enter the password you want to use.
- Enter the password again for confirmation.
- Click to get the verification code.
- Check your email and enter the code.
- Agree to the terms.
- Click to create the account.
After the account is created, return to the download page and click the target version again. The browser will download the installation package.
The package name changes by version. This guide uses browser_team_x.y.z.tar.gz or browser_full_x.y.z.tar.gz to represent the actual downloaded file name.
1.5 Upload and Extract the Package
Upload the package from your local computer to the server. You can use scp, a server control panel, a bastion host, an SFTP tool, or your cloud provider console.
Example:
scp browser_team_x.y.z.tar.gz root@192.168.1.105:/opt/Log in to the server, enter the upload directory, and extract the package:
ssh root@192.168.1.105

cd /opt
tar -xzf browser_team_x.y.z.tar.gz
cd browser_team_x.y.z
If you downloaded the Full version, replace the file and directory names with the actual names:
tar -xzf browser_full_x.y.z.tar.gz
cd browser_full_x.y.z
1.6 Run the Installation Script
After entering the extracted directory, run the installer:
# Run the installation script
chmod +x install.sh
sh install.sh
The installer asks for deployment parameters one by one. Fill out the following table in advance and enter the values during installation.
| Prompt | Recommendation |
|---|---|
| Installation directory | Use the default if possible. If you customize it, use a dedicated directory and make sure the current user has enough permissions or have sudo privileges. |
| Server private IP | Enter the server’s private address, such as 192.168.1.105 |
| Server public IP | For public deployment, enter the public IP. For LAN deployment, enter the same private IP |
| Domain name | Use your domain if you have one. Otherwise use the public IP or private IP |
| System name | The system name displayed on browser pages, such as Sa2web Demo |
system user password |
Set a strong password. Pressing Enter directly uses the default password abc123456 |
| Certificate generation option | Choose 1 to request a certificate for a public domain automatically, 2 for a self-signed certificate, or 3 to use your own certificate |
Certificate options by scenario:
| Option | Scenario |
|---|---|
1 |
The server is deployed on the public internet, the domain already resolves to this server, and you want to obtain a free HTTPS certificate automatically |
2 |
LAN testing, no domain name, or temporary IP-based access |
3 |
Your organization already has certificates and needs to use its own certificate files |
When choosing option 2 for LAN deployment, see Section 1.10.1 and Section 1.10.2 if you do not want the browser address bar to show a security warning.
If the script continues to ask uncertain advanced questions, press Enter to use the defaults for the first test. The script loads offline images, generates docker-compose.yml, writes configuration, and starts containers.
Do not keep the default password abc123456 in production. Even if you pressed Enter during installation for a quick test, change the system password immediately after the first login and create a backup administrator.
For public deployment, also open these ports in your network settings:
| Port | Purpose |
|---|---|
| 443(tcp), 80(tcp) | Default ports for HTTP(S) access |
| 3478(tcp,udp) | Required for WebRTC communication. Open additional UDP ports such as 49160-49200 as needed |
1.7 First Visit to Sa2web
After installation, open the deployment address in a browser:
https://<APP_DOMAIN>/Examples:
https://192.168.1.105/
https://browser.example.com/
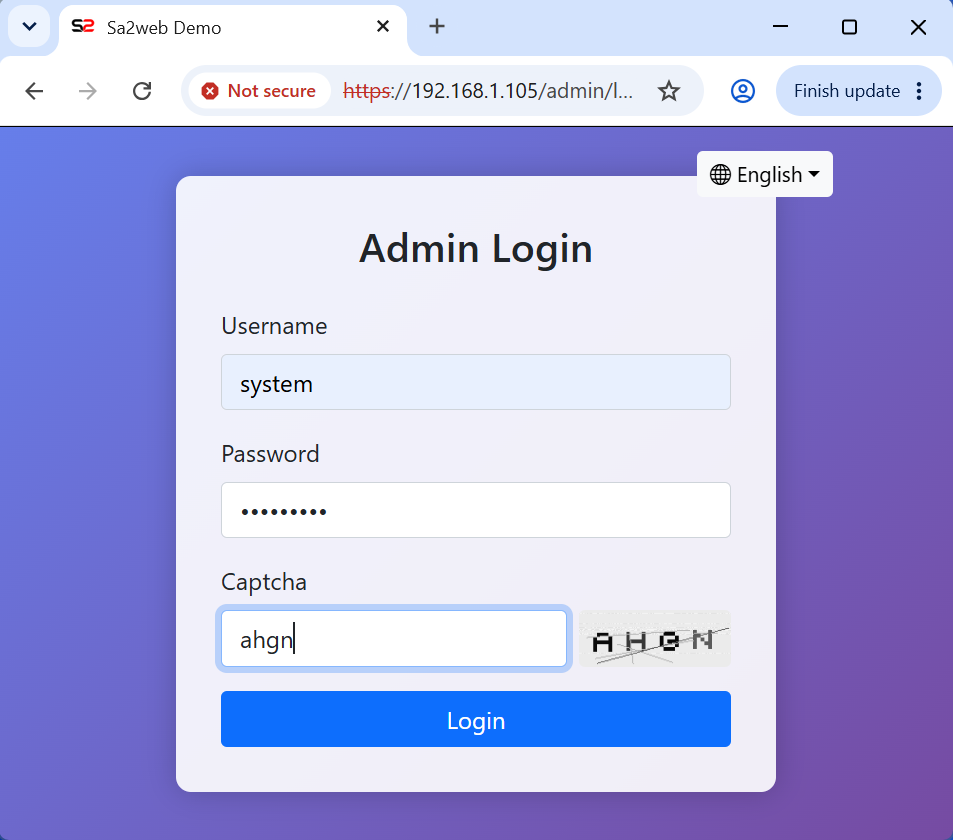
The admin console login address is usually:
https://<APP_DOMAIN>/admin/loginLog in with the system user and password configured during installation. Enter the verification code as prompted on the page, as shown in Figure 1.1.
1.8 Register the License
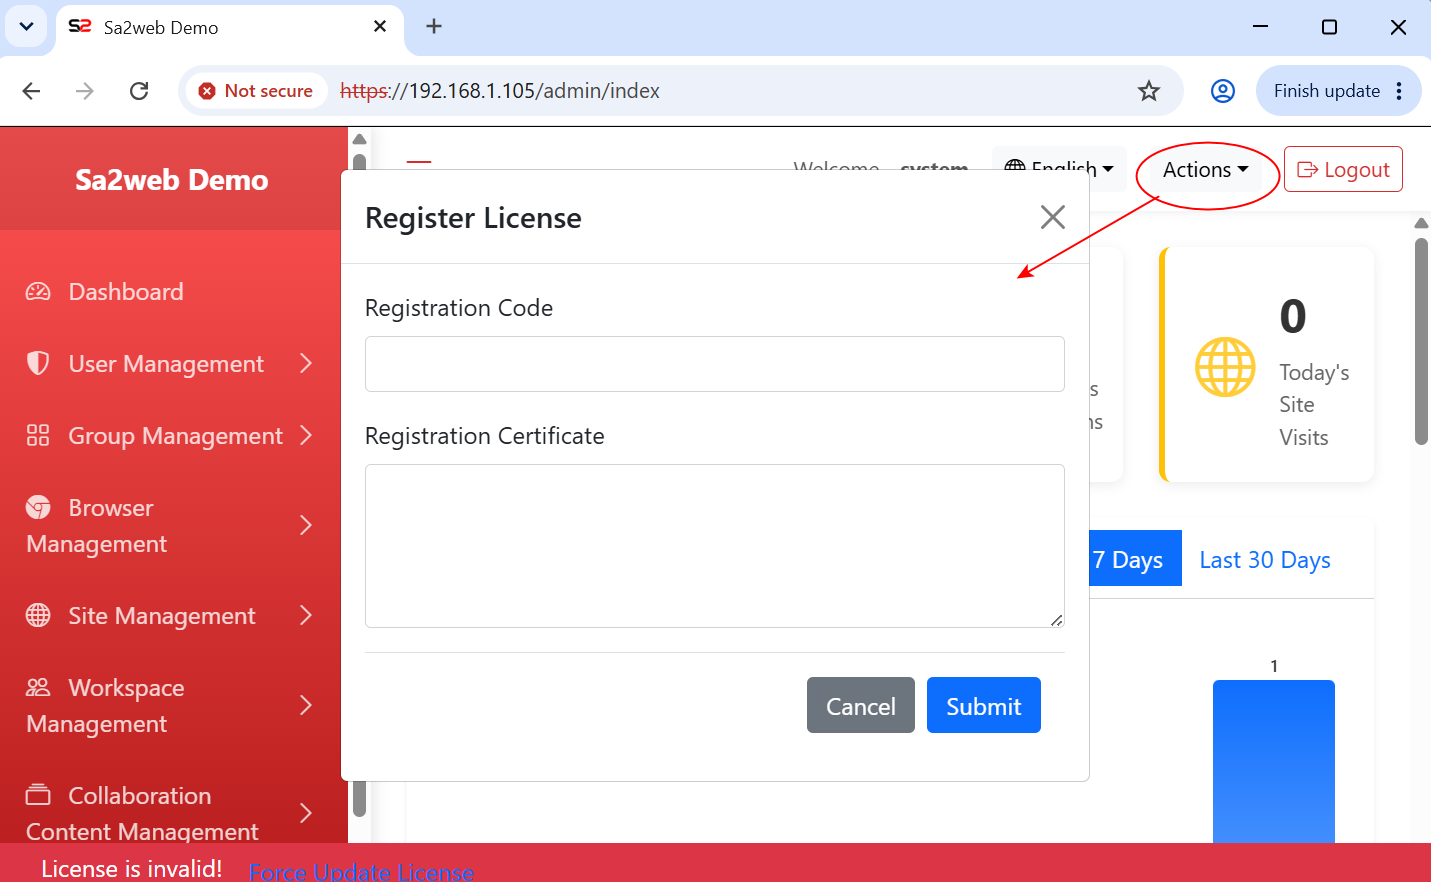
After logging in to the admin console, open the license registration dialog, as shown in Figure 1.2.
Then return to the Sa2web website:
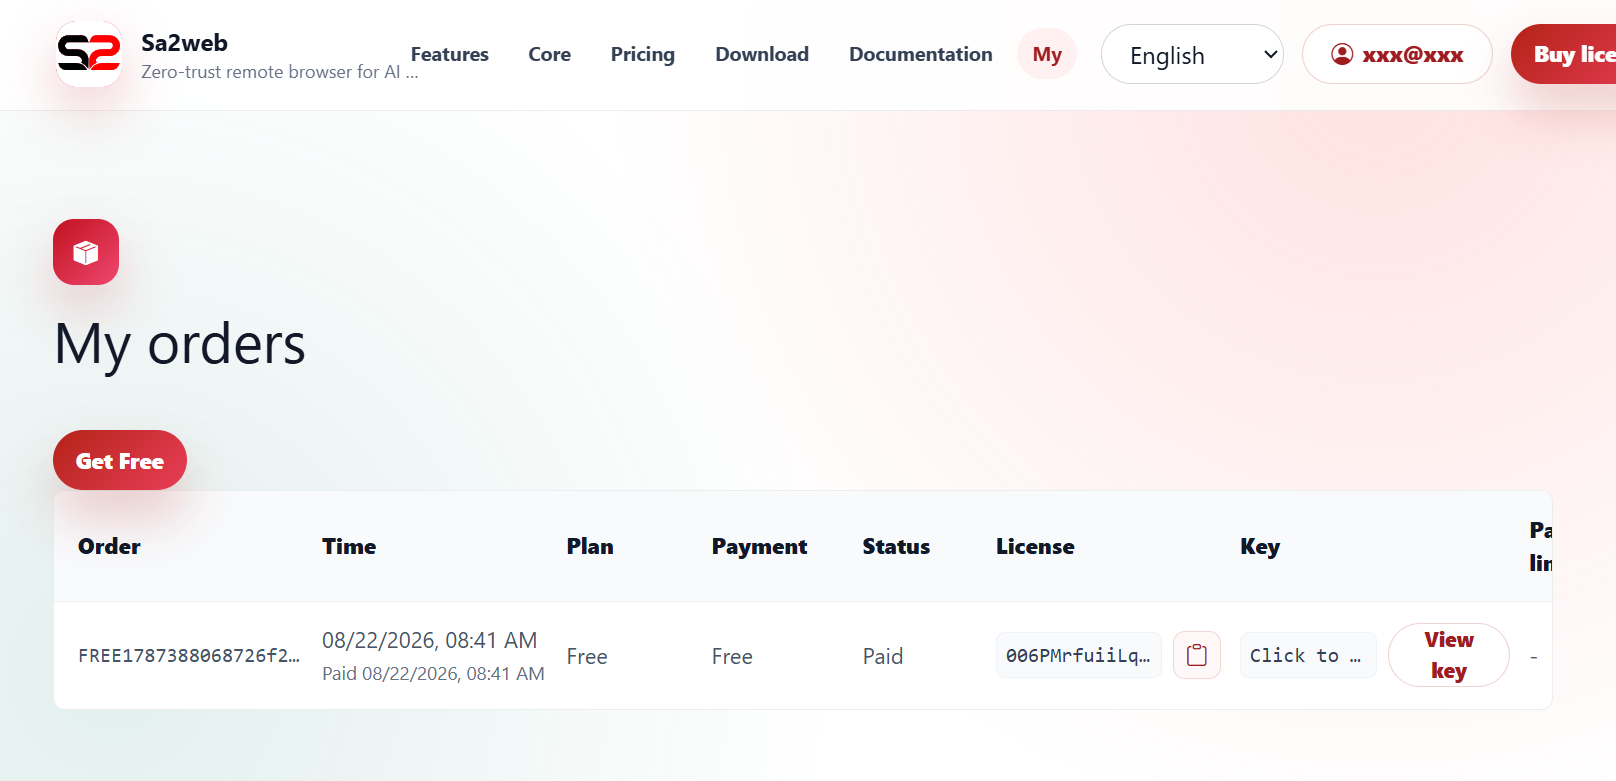
https://www.sa2web.comOpen the My page and get a free license from the account center. Copy the license and key from the page into the license registration dialog in the admin console and save, as shown in Figure 1.3.
A free license is usually suitable for learning, validation, and small-scale trials. Some advanced capabilities may appear in the UI but may not take effect depending on the license type.
1.9 Service Status and Logs
View container status:
docker compose -f <installation-directory>/docker-compose.yml psView application logs:
tail -n 200 <installation-directory>/logs/app/app.logOr view Docker Compose logs:
docker compose -f <installation-directory>/docker-compose.yml logs --tail 200 --follow1.10 Local Browser and SSL Certificates
1.10.1 Sa2web Deployed Publicly with Your Own Domain
- At your domain provider, such as Cloudflare, point the domain DNS record to the IP address of the server where Sa2web is deployed.
- Open ports 80 and 443 in the network settings of the Sa2web server.
- When users first visit
https://<domain>/, Sa2web’s Caddy service automatically requests a trusted certificate from Let’s Encrypt. The user browser will no longer show an insecure certificate warning.
1.10.2 Sa2web Deployed on a LAN with a Caddy Self-Signed Certificate
- First obtain the certificate. You can get
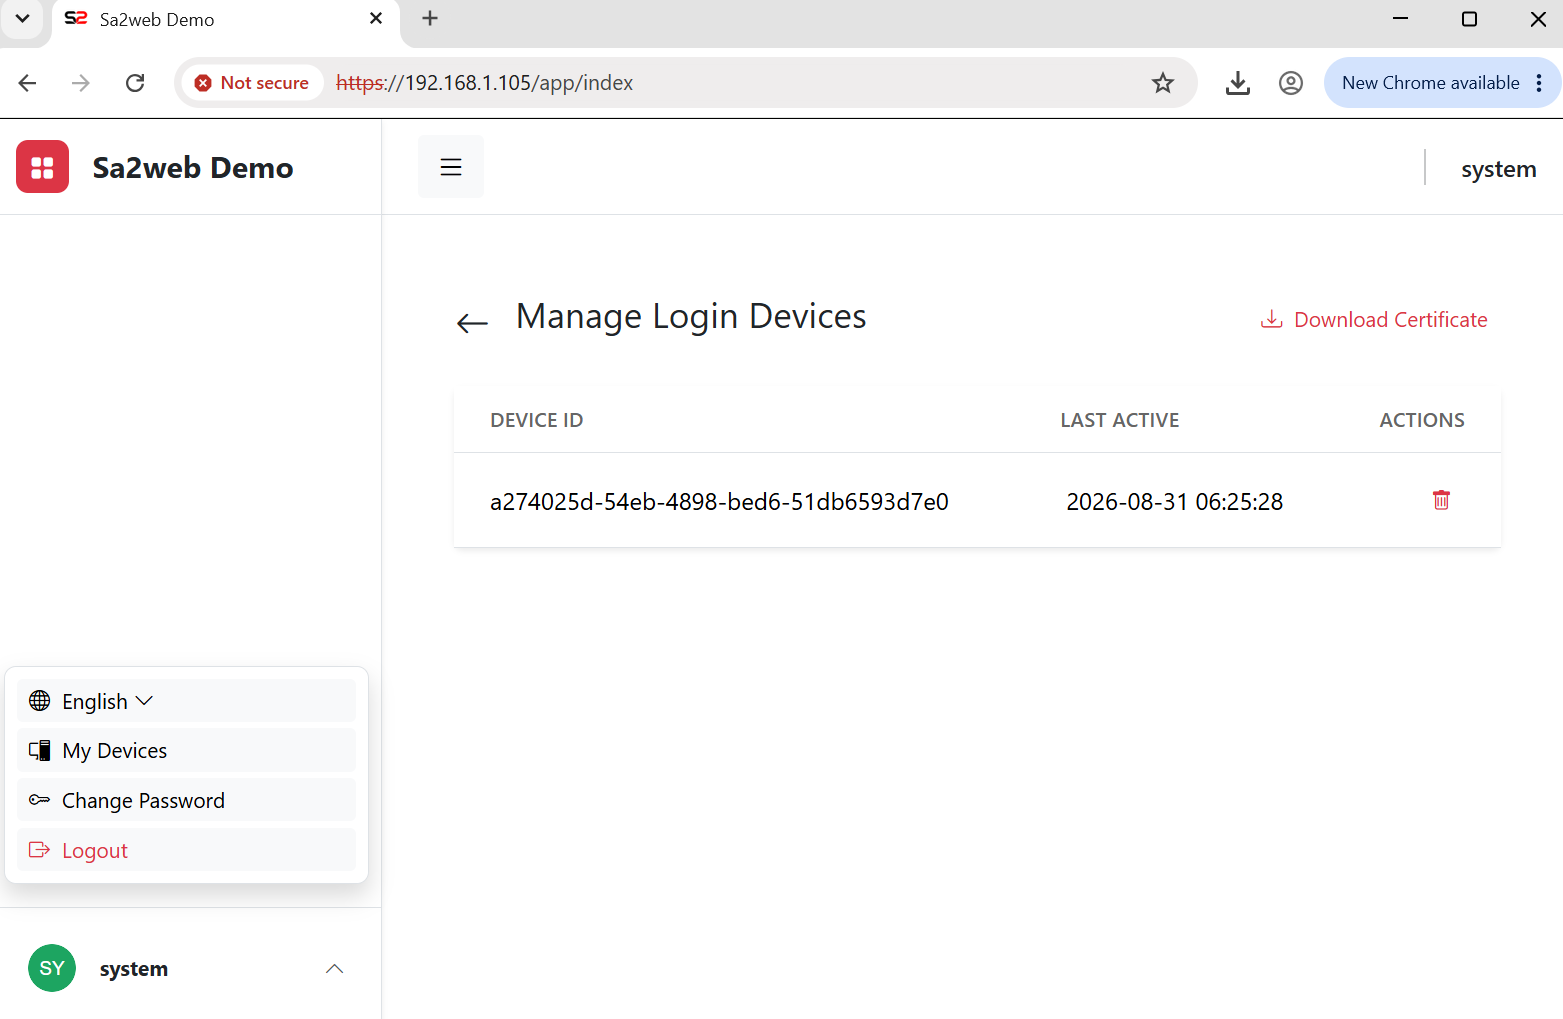
root.crtfrom$INSTALL_PATH/data/caddy/pki/authorities/local/root.crtand send it to users for installation. Alternatively, users can click the lower-left pop-up menu, click My Devices, then click Download Certificate, as shown in Figure 1.4.
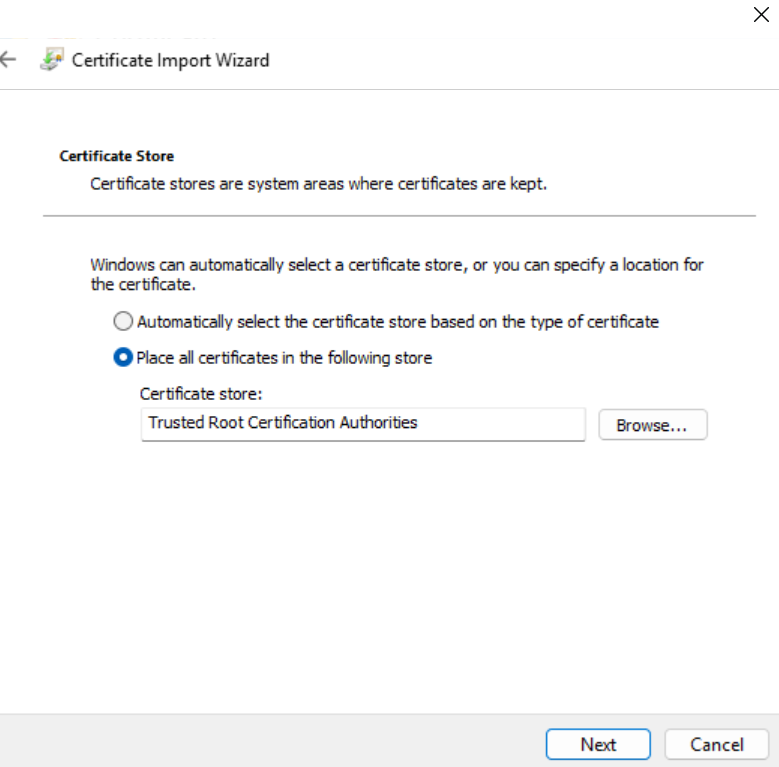
- After downloading the certificate, install it into the trusted root certificate store, as shown in Figure 1.5.
- After installing the certificate, quit the browser and reopen it. When you visit again, the browser no longer shows an insecure certificate warning, as shown in Figure 1.6.

Common checkpoints:
| Problem | What to check |
|---|---|
| Page cannot be opened | Security group, firewall, DNS resolution, and certificate mode |
| Login fails | system password and verification code |
| Machine is offline | Machine IP, port 7000, and container status |
| Browser cannot start | Docker Compose logs and machine status |
| Isolated network unavailable | Browser proxy configuration and whether the group is authorized for that isolated network |
1.11 Acceptance Checklist
References:
- https://www.sa2web.com/docs/en/install/prerequisites
- https://www.sa2web.com/docs/en/install/deploy
- https://docs.docker.com/engine/install/ubuntu/